YOU SPENT $2000 ON WHAT???
Page 1 - Page 2 - Page 3 - Page 4 - Page 5 - Page 6 - Page 7
17 December 2005
No, you haven't skipped a few pages, I simply didn't update this project for three and a half years!
By happy coincidence, a VERY lucky man near Vancouver, BC was doing a high-class equivalent of dumpster diving and... argh, I'll let him tell the story:
"We have a recycle depot where you can take paper, plastics, glass and metals. About two months ago I was there to drop off some stuff for our neighbour, when I saw it. Someone had dropped off this lathe, a Hercus, with 2 x 3-jaw chucks, a 4-jaw, factory legs, a mountain of tooling, and a metric threading indicator. All that was missing was the quick change gearbox and an imperial threading indicator. I got a quick change on Ebay for $150. The lathe was just covered in dirt and grease, totally stripped it down, cleaned it up, everything works, everything is tight, great little machine."
Yes, Virginia, there IS a Santa Claus!
Anyway, he has an imperial lathe with a metric indicator, I've got a metric lathe with an imperial indicator... right now there are two parcels at the mercy of the postage gods and hopefully within a month or so there will be two complete lathes and two happy owners.
Which brings me back to the promised update on the Rubberflex collets.
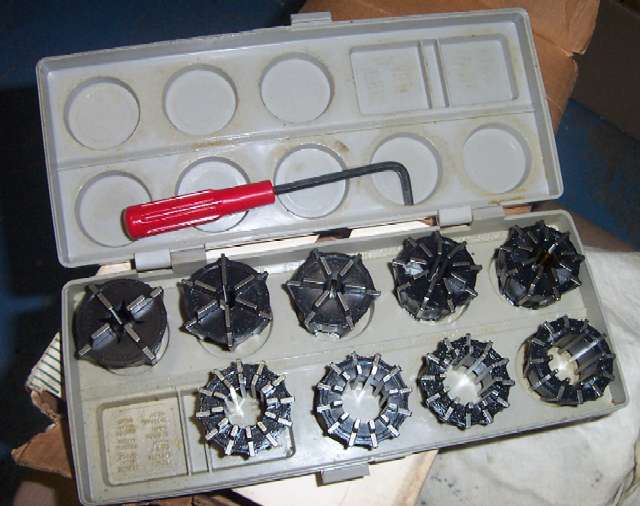
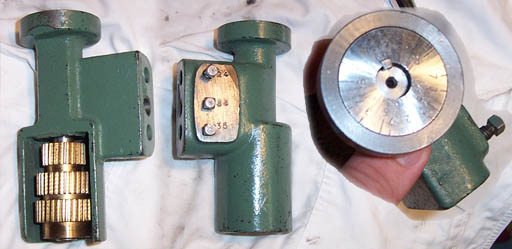
They arrived in good condition in mid July 2002. I was a little taken aback, the chuck was much larger than I was expecting and weighed about the same as a 4" 3-jaw. In case you've never heard of a Rubberflex, the collets consist of precision wedges embedded in a moulded rubber carrier:
This set of ten collets (one is in the machine) covers the range from 2.5mm to 27mm - each collet has a working range of just under 1/8".
The chuck consists of a substantial backing plate (quite roughly turned, I was surprised at the low quality of finish as it is a genuine Jacobs article), the chuck
and 160mm dia black plastic operating handwheel, and collet closing nosepiece.
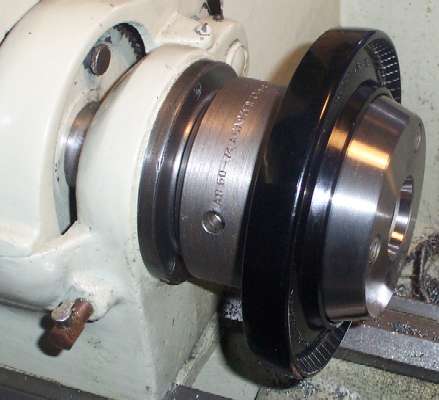
When the handwheel is turned, it revolves the three two-start nosepiece mounting studs. The nosepiece comes completely off to insert the desired size of collet:
Note the six bolts holding the chuck to the backing plate. Part of the chuck installation involves loosening those bolts and aligning the chuck taper
to give zero runout. That hasn't happened yet, the runout as-shipped is only in the order of two thou or so but when I do need accuracy I will have to bite the bullet
and do the alignment work.
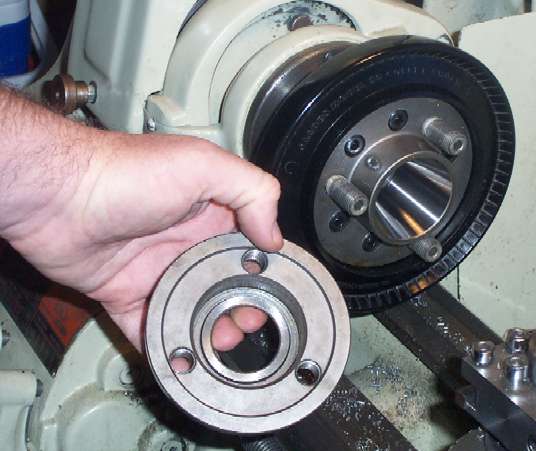
The two working faces of the chuck are the taper, and the flat ring in the centre of the nosepiece (by my two fingertips).
With the collet in place, the nosepiece can be offered up to the studs and the handwheel rotated to draw it in. As the flat ring makes contact with the outer stepped piece of the collet wedges, it pushes the collet back into the taper and onto the work. There is a surprising amount of grip when hand-tightening the chuck, the special Allen hex tool (with the red handle in the first photo) is used to nip it tight.
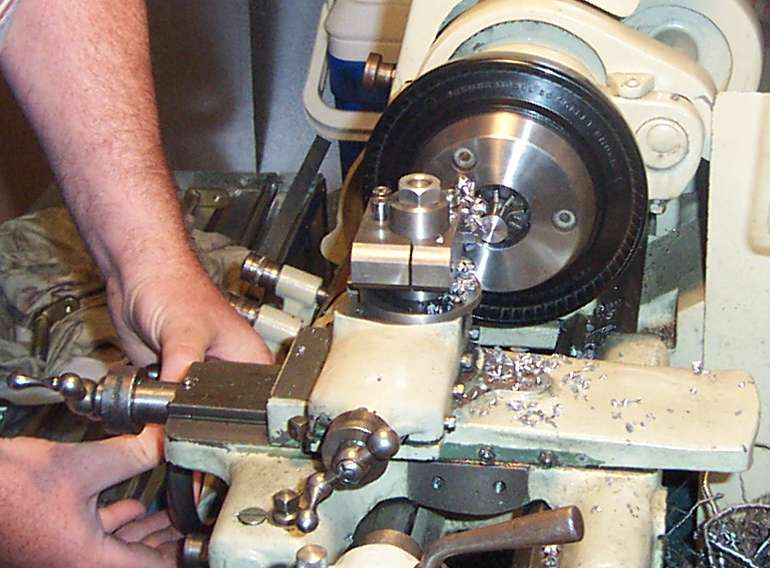
Put it all together, and ta-daaa... The chuck is shown in use holding a 16mm tool steel bar. With the Mason toolholder I made a while back, I'm using
a standard 1/4" square HSS right hand knife tool to take it to 8mm in one pass at around 1800rpm - a 4mm cut without any problems at all.
The camera has frozen the moment, trust me there was a lot of swarf coming off. Only thing is the little bit of backlash in the gears from the handwheel
to the studs causes the handwheel to rattle in operation. One day I might take it apart to see if it can be adjusted out, but I don't think so.
I'm happy with it as it is.
I think that for general turning, I'm over my infatuation with carbide tips - even using a positive rake tip, I'm challenged to take off more than about 1.5mm
in a cut without chatter. A properly ground HSS tool, with a few swipes from a diamond EZ-Lap to hone the edge, just walks through the silver steel workpiece. Another
illusion shattered!
Anyway, no promises on the next instalment, except it'll be when I've got something interesting to say!
Cheers
Charlie
PS: Decided to see what I could do with the increased rigidity and grip of the collet.
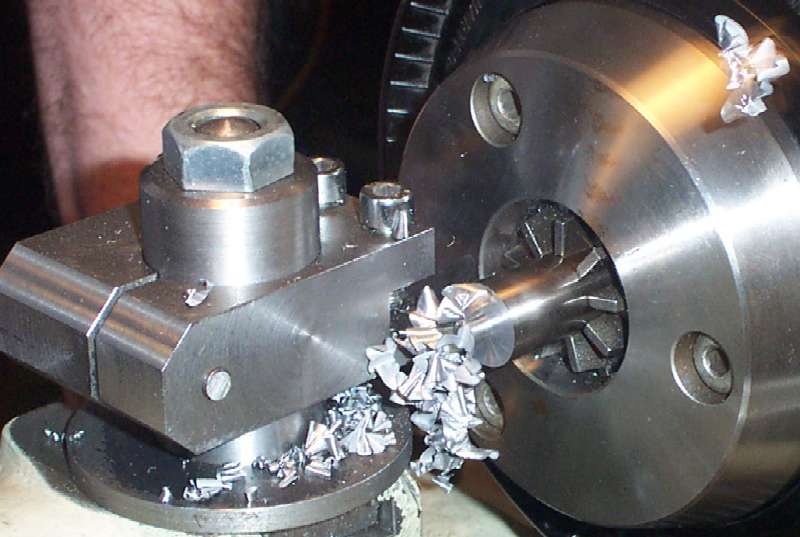
That's a 5.5mm cut - 16mm down to 5mm diameter in one pass - in silver steel. The swarf apart from the bit hung up on the tool is tight, perfect little cones that form 3-5 layers before breaking off. The tool has to be sharp because remember it is only a 0.37kW (1/2HP) motor, with the belts set to fastest direct drive and the inverter at 50Hz. For the insatiably curious I have a Youtube video here
3 March 2006
The TDI arrived today. Thanks, Howard!
As you can see, it is in brand new condition.
Unlike the South Bend indicator, this has 24T, 33T and 35T gears, and is numbered on top instead of lettered. In early 2007 Phil Frost
helped out by providing the engagement chart:
For a Hercus Lathe, 3mm pitch lead screw.
The following pitches can be cut without a dial:
0.20, 0.25, 0.30, 0.50, 0.60, 0.75, 1.00, 1.50, 3.00.
With 24 teeth (pitch, position):
0.40, 3. 0.45, 2. 0.80, 3. 0.90, 2. 1.20, 3. 1.60, 3. 1.80, 2. 2.00, 3. 2.40, 3. 3.60, 1. 4.00, 3. 6.00, 3. 8.00, 3.
With 33 teeth (pitch, position):
1.10, 3. 2.20, 3. 5.50, 3.
With 35 teeth (pitch, position):
0.35, 5. 0.70, 5. 1.25, 7. 1.40, 5. 1.75, 5. 2.50, 7. 3.50, 5. 5.00, 7. 7.00, 5.
Hope this helps, regards
Phil
1 February 2007
Haven't done a lot in the meantime. Been trying to cut threads with all sorts of bother. Fortunately Phil again took pity on me and helped me with some information. Armed with that, the spare parts manual, and a pile of parts I was able to figure out what I was doing wrong.

The correct way to set this machine up is 20T or 50T on the stud, 80T idler, and 45T on the gearbox input shaft.
Do not do as I did, and have 50T on the input shaft. It now works as advertised!Note: Phil's reference, the Hercus "Book of Turning" has 18T or 45T on the stud and 60T on the input shaft. That is to cut a range of threads from 0.25mm to 5.0mm pitch. There must be at least two different types of metric gearbox out there, as with the 20T/50T and 45T combination mine will cut 0.2mm to 7.5mm pitch.
14 November 2007
Had an enquiry from Ken Jerrems who also has a roller bearing Hercus. His had seized and after a lot of coaxing and cleaning out has it turning, but with noise and a lumpy feel. Hopefully a bit more cleaning and flushing may cure it. He was quoted $650 for replacement bearings from Axmell, which is a bit high even for precision bearings. We're trying to find the manufacturer and model markings to see if they can be sourced elsewhere.
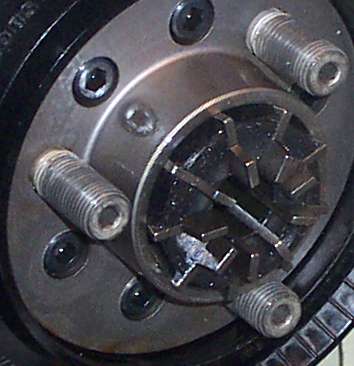
I pulled off the front bearing cover to have a look at mine. Got the sinking feeling I wished I'd never started that particular job.
Remember many pages back how J and N "Engineering" were going to fit new bearings?
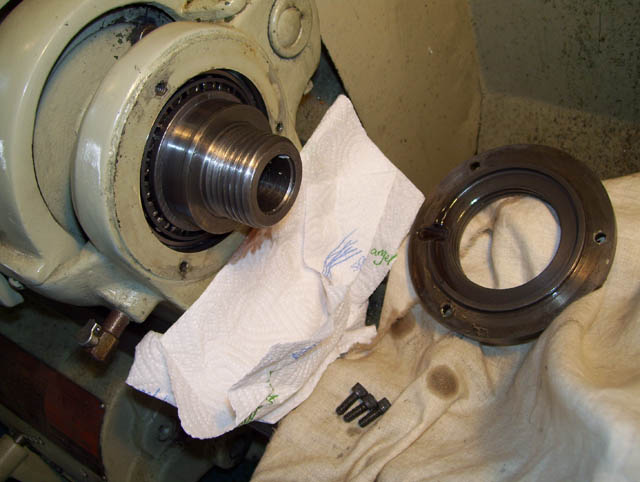
If the bearing has manufacturer details, its on the other side and I'll have to pull the bearing to see.
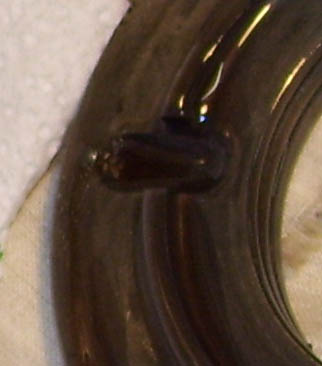
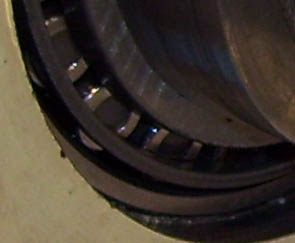
I was somewhat disillusioned to see not only the bearing cover oil well full of paint chips and swarf (the photo was taken after I'd wiped it out with a rag), the screws holding it on were in a similar state and the crap around the periphery of the bearing indicates that its been nicely pulverised and distributed around the outside. You can also see the scores on the spindle where it has been run with loose bearings and no oil, and has rubbed against the cover.
At this stage I have simply cleaned up as best I can and put the cover back on. I really don't feel able to handle a stripdown of the headstock right now.
On the bright side, J & N is no longer in business (officially) but they are still doing service work. I'd think twice before calling them.
15 November 2007
Ken has heard back from a very helpful chap at Timken. From their records:
Rear 14138A / 14276....Class 3 Precision
Front 18685 / 18620....Class 3 Precision
Given the prices on the net, $650 for the pair might not be too out of the way. But we'll see what Ken comes up with regarding pricing over the next few days.
19 January 2009
Ha! Another year skipped. I emailed Ken late in 2008 and the consensus was that, as hobby machinists, we would not be in a position to know the difference between a headstock fitted with off-the-shelf bearings for $100 and the precision bearings for $1000. He has a friend who runs a CNC production shop and his worn machines are refitted with standard bearings without detriment. It's a comforting thought and one that I'll cling to when the time comes to do something about mine.
Just a little thing I played with yesterday:
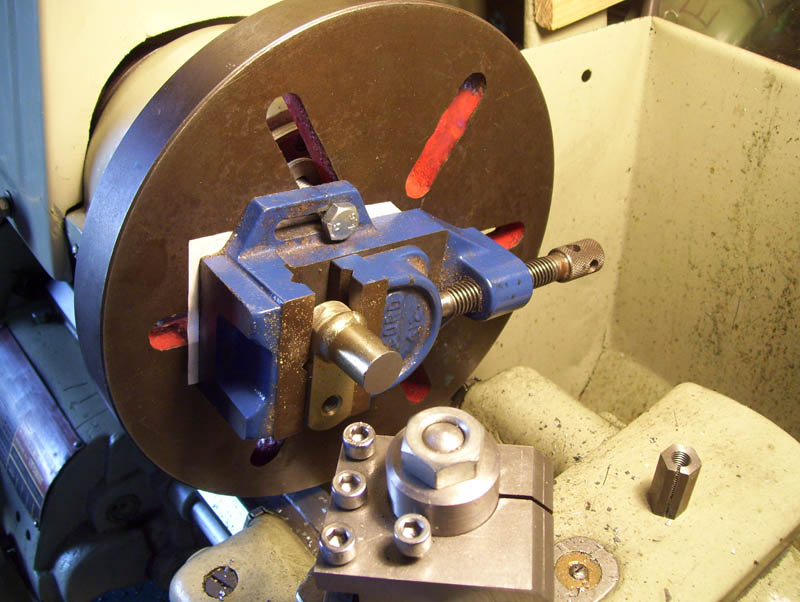
I needed to shorten a shaft with a lug welded on. Because of the welds I couldn't hold it properly in the 4-jaw, and didn't want it flying out. I was going to bolt it to a plate and bolt that to the faceplate, but saw the drill vice and had a better idea.
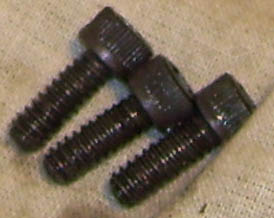
I bolted the vice to the faceplate with 8mm bolts and was heartily congratulating myself when it became apparent (e.g. bleedingly obvious) that the bolts were too long and would hit the headstock. So I needed shorter bolts. Didn't have any. But I'm on a "do it properly" kick at the moment and so instead of 30 seconds with a hacksaw, made the threaded collet shown on the cross slide out of some 9/16" hex that was lying around. The 8x1.25mm thread was tapped under power at about 40rpm, stopping and reversing out every four or five revolutions to clear the chips. Dead easy with the inverter controller. I could tell when the tap started cutting because the back gear stopped rattling when it took up the load.
Once the thread was done, both ends were cleaned up and the split hacksawed in (mental note - time to buy a slitting saw or three). It took a fair effort to close so I grooved the side opposite about halfway through. Having marked the flat next to No1 jaw on the chuck, I ran the bolt into the collet, stuck it in the 3-jaw, cut it to length and chamfered. Ditto for the second bolt. I now have two perfect bolts.
Then the lug could be put in the vice and checked for flatness. The end of the shaft was reduced to length and parallel with the flat using a normal knife tool at around 100rpm. Finish was not the greatest as it was quite tough steel, but I'm happy with the job.
Page 1 - Page 2 - Page 3 - Page 4 - Page 5 - Page 6 - Page 7