YOU SPENT $2000 ON WHAT???
Page 1 - Page 2 - Page 3 - Page 4 - Page 5 - Page 6 - Page 7 -
30 April 2002
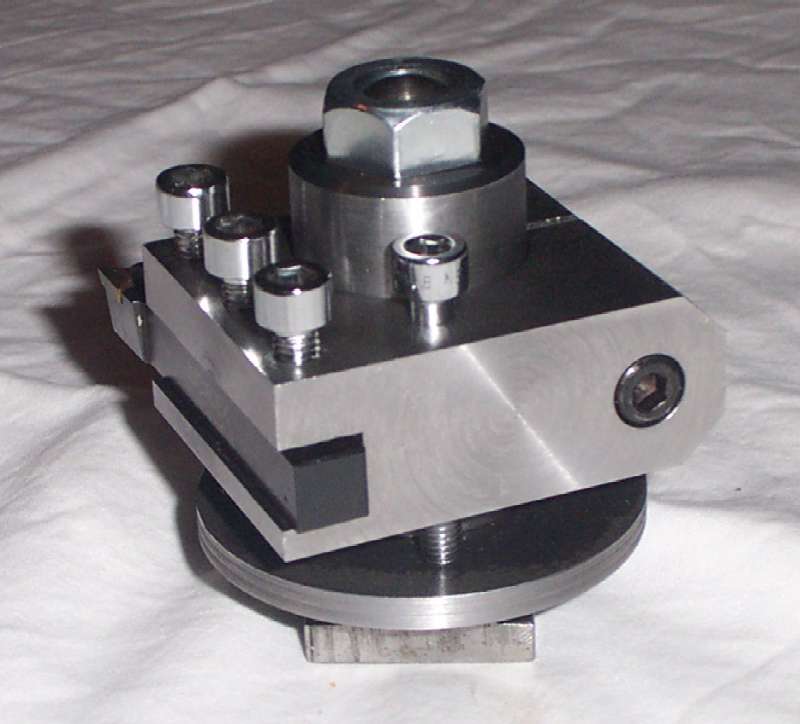
I completed the toolpost and first toolholder. Not bad for a first project, even if I do say so myself.
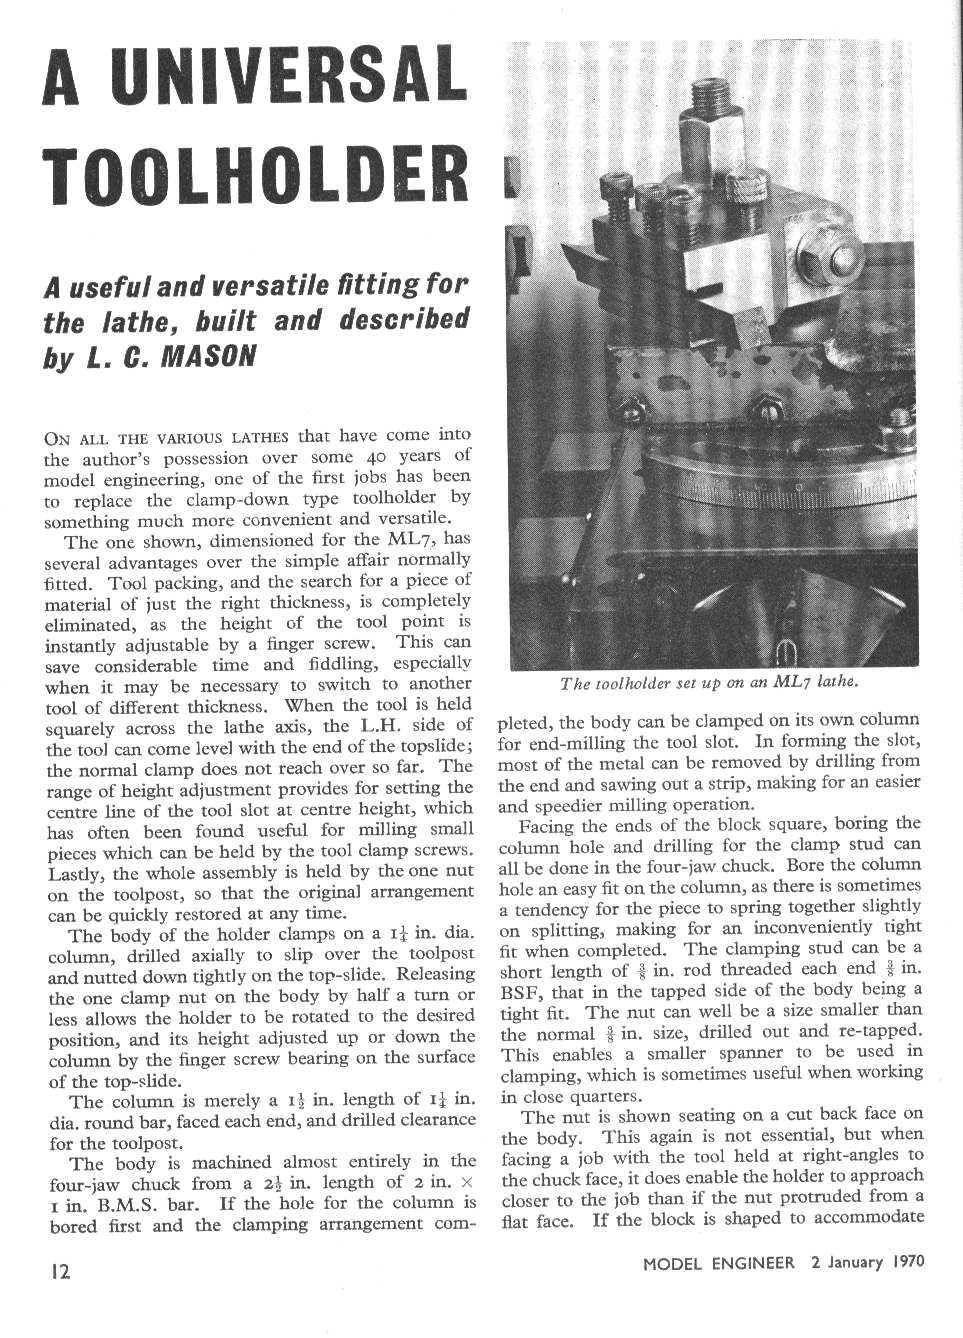
Universal Toolholder by LC Mason
Here's the first toolholder I made for my new Hercus lathe, to replace the 4-way turret toolpost. I'm really impressed with the rigidity and ease of adjustment.
The article appeared in Model Engineer, vol 136 No 3384, 2-15 January 1970. As that issue is probably hard to get hold of now, I've scanned the article and put the jpegs here.
I've standardised on 6mm capscrews for everything except the top nut. That makes it easy to use a 5mm T-driver to quickly swap tools in and out or to adjust the height.
17 June 2002
After getting advice from valued friends on the model engineering list, I took the plunge and spent USD$500 on ebay for a Jacobs #50 chuck and a set of Rubberflex collets. It'll be a few days before they arrive and I just hope the extra AUD$900 ($1100 with postage and tax) is worth it. I think it will be.
21 June 2002
One thing that continued to bother me with the lathe was the non-matching tailstock. This was approximately 0.0125 low, which doesn't sound a lot, but results in wobbly drills and tapered work. (OK, the taper due to vertical misalignment is infinitesimal, but it bugged me, alright?)
For instance, a drill point fed in from the tailstock would scribe a circle 0.025 diameter on the end of the workpiece. Even small centre drills would only start with a protest, and I didn't want to break a point off one. Hence all my drills were started with a No 3 or larger centre drill - quite out of proportion for a lot of the work I was doing.
Finally it pissed me off enough to do something about it. The error wasn't bad enough to warrant machining the base of the tailstock and putting an insert plate into it. Instead I decided to split the base and shim the halves.
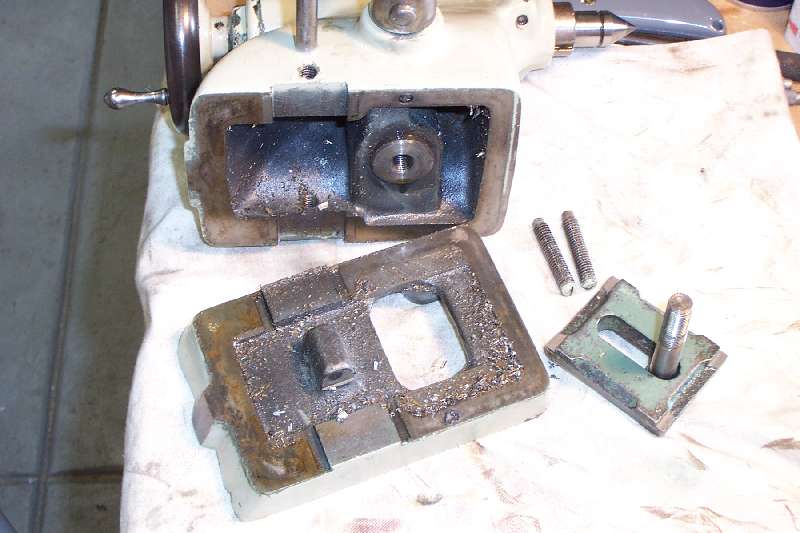
I'd been putting off the job of stripping the tailstock because I had a good idea what I'd find underneath. Yep, years of crud and J&N Special Beige Paint'n'Grease'n'Swarf.
Disassembly is straightforward - the base is a close fit on the centre ways. Remove the locking bolt and plate from underneath, and slacken the two adjuster screws on the side. You don't need to take them out, unless you want to clean them too. I knocked the base off with light blows from a rubber hammer, then everything went into the kerosene bath.
A couple of years ago I got annoyed with never having the right sized shim stock on hand, for setting tools to centre height and so on. Buying minimum quantities of each useful size would have quickly bankrupted me. I don't remember who put me onto the idea, but here's a beauty - I came across sets of Chinese feeler gauges, 12" long by 1/2" wide, on sale for $5 each. I use Moore and Wright feelers when I need to - but here's heaven-sent, ready-packaged, quantities of good quality steel shim at dirt cheap prices. I lashed out and bought two sets.
Even though I'd measured the vertical offset at 12.5 thou, I figured that a slightly thinner shim would be needed. There always seems to be a little bit of subtle addition going on when you shim things. I'd just pulled out a 0.25mm feeler gauge and was reaching for the scriber when my eye fell on some other shimstock - paper guide fingers liberated from a scrapped IBM mainframe printer. This other stuff was just a fraction over 5 thou thick - if I doubled it up, it would be ideal and would save me from the angst of destroying a tool. Mind you, being a $5 set of feeler gauges, the amount of angst wasn't large.
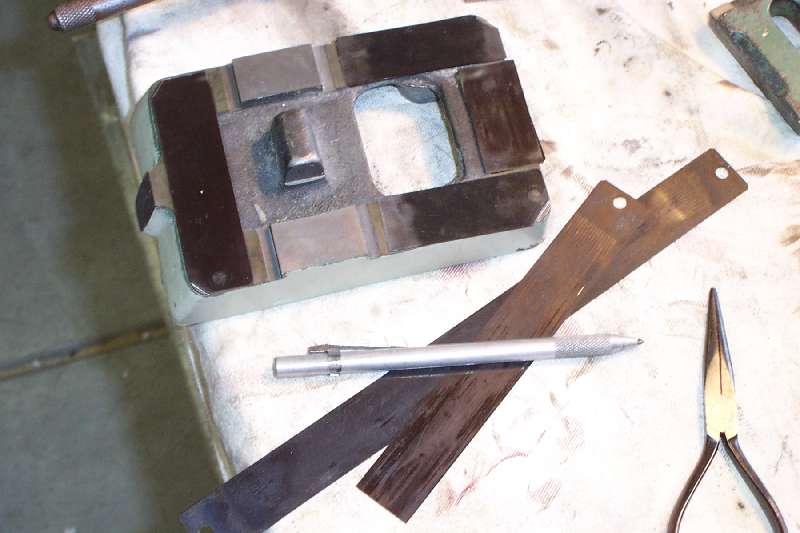
Here's the cleaned-up base with four pairs of shims cut and roughly positioned. I cut the shims by scribing a line across three or four times with the carbide-tipped scriber, and snapping the shim at the line. I cut the corners off with an abrasive wheel in the Dremel motor tool. I could have used it to cut the shims as well, but the scribe'n'snap was a lot quicker and avoided marking out.
The light patches on the finished shims are where I'd rubbed off any surface distortion on 600-grade emery paper.
A few drops of oil on each shim, and the tailstock body was ready to drop on. I put it on and temporarily sat the tailstock inboard of the saddle to do an alignment check.
Vertically it was spot on, horizontally it was way off, as you'd expect from disturbing the alignment of the base.
I used a spare end of shim, and held it between the two centres. The deflection from perpendicular showed which way to adjust the screws. I thought this would be a difficult operation but it actually turned out to be very simple and quick. Once it was lined up I tightened each screw by the same amount. Then I extended the barrel to the full travel - just over 2" - and checked again. Spot on.
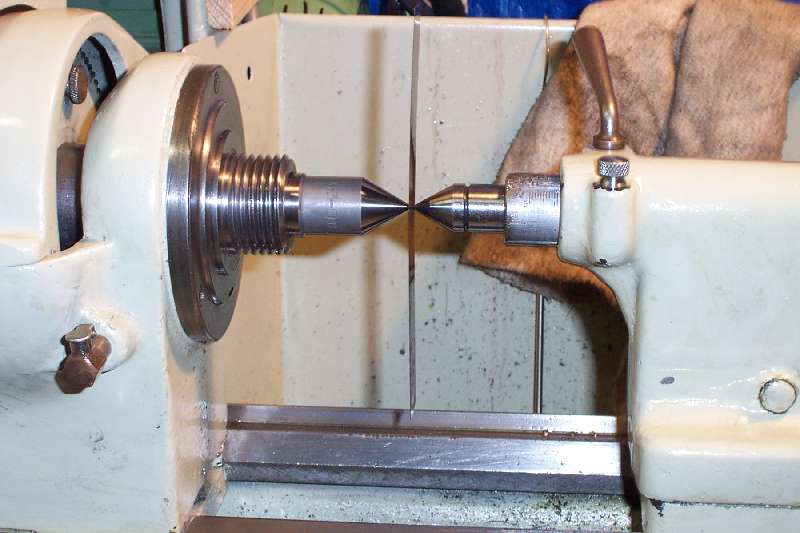
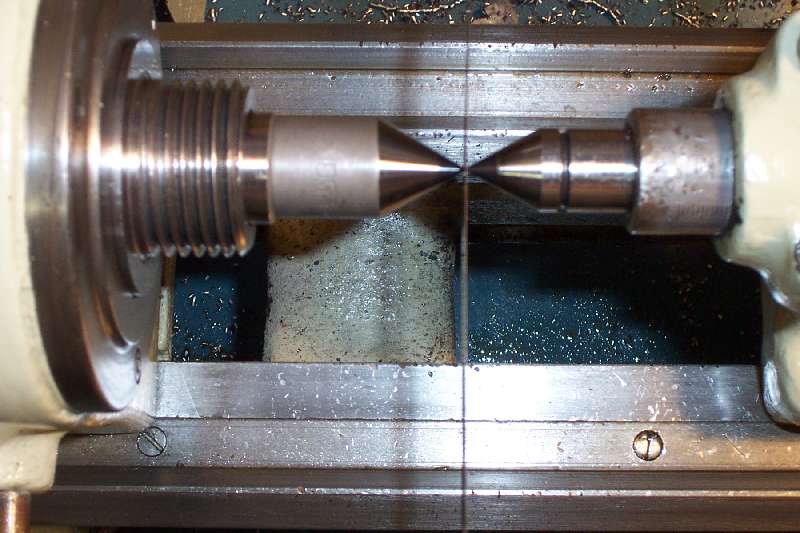
Because I don't use a headstock centre all that much, I bought a cheapy Chinese one from a local supplier. The tapers are dead accurate, but the plain part (light grey in the photo) was rough turned - VERY rough turned - and wasn't concentric. When the centre rotated it wobbled alarmingly, even though the point was still. While I was in the mood, I put a carbide tool in my homebrew toolholder and machined it parallel.
Next instalment - we'll see when the Jacobs collets arrive!
Cheers
Charlie
Page 1 - Page 2 - Page 3 - Page 4 - Page 5 - Page 6 - Page 7 -