OK, you've spent several evenings bashing your head against gmax or paintshed and now you'd like to upload your creation to the Download Station.
But there remains the little problem of... ART FILES and SCREENIES!
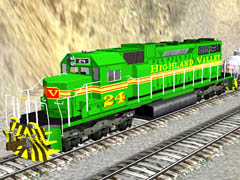
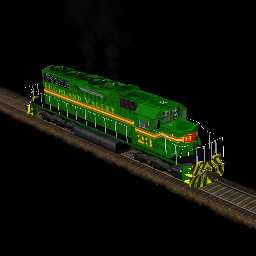
If you haven't got that far yet, your creation probably looks a lot like the
screenshot below. If you're using Paint Shed, the files will be there but they
will be pretty basic, and will not show any detail.
I'm operating from scratch, so if you see things filled in for you by Paint Shed,
just carry on through to the parts of interest to you. You can certainly improve
on the default screenshots put in by Paint Shed, as they will not include any logos
that you have applied. Just don't save the PS model again, as you'll overwrite
everything you create below!
First you'll need to go to your creation's directory. We'll use my system for explanation purposes. My Trainz directory is E:\TRAINZUTC. The default is C:\Program Files\Auran\Trainz. Your creations will be in ~Trainz\World\Custom\ in a subdirectory such as scenery or trains.
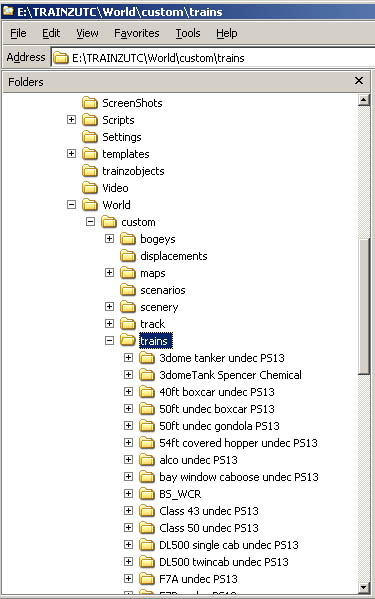
Go into the project directory:
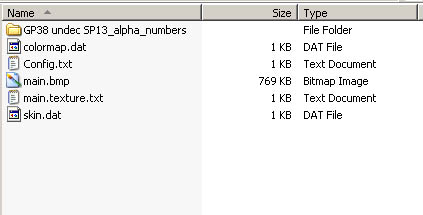
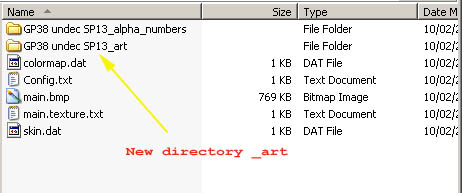
We need to create a directory for our art files. Examine the config.txt file for the asset filename:
asset-filename GP38 undec SP13
Now create a directory of the above with _art appended to it:
Go into the new directory and create two new blank text files:

This is where we decide what format to make the art files. If you're using
Paint Shop Pro or Photoshop, then .tga with an alpha channel is your best bet.
If you've used MS Paint or a similar basic package, then there's nothing wrong
with doing it with .bmp files.
Edit the text files and create entries pointing to our yet-to-be-created art files. I'll demonstrate .tga first and then .bmp:
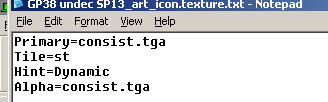
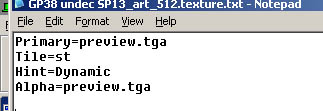
Notice the filename is the same for both the art and the alpha, because the alpha information is embedded into the tga file.

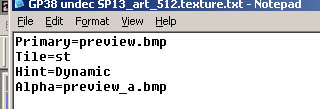
With a bitmap, we need two separate files, as you can see. Naming the alpha files with a "_a" is just a convention, you can call them what you like.
Boy, a lot of words have been written trying to get peoples heads around the concept
of alpha files.
It took me months and months until it finally clicked. This is all in a readme file
somewhere no doubt, but I never came across it!
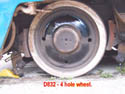
Take a picture, any picture:
Cut a piece of cardboard to fit over the top, and cut a hole in it:
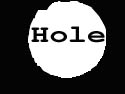
Now lay the cardboard over the top of the picture:
Voila! This is what an alpha layer, or alpha file, does. It shows what part of
an image to display. Alpha layers don't need to be black and white, they can be any
greyscale shade in between. The darker they are, the less of the image shows through.
We use this property to display images of our creation, overlaid on top of a background
picture. The white parts of the alpha layer show our model, the black parts block out
our model and the background shows through.
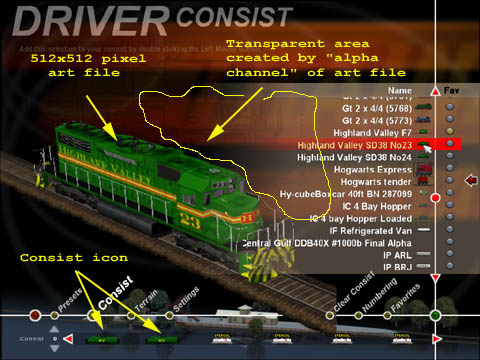
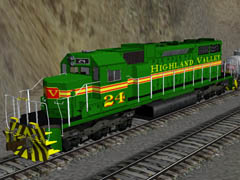
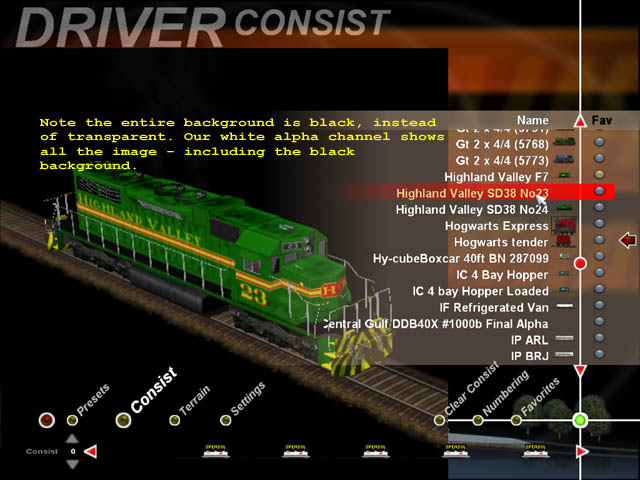
We need at least three screenshots for our package.
First, a general screenie we use on the CDP to show off the model.
Second, a three-quarter-view which we use for the Driver consist selection screen.
Third, a side-on view we use to create the consist icon.
Fourth, a nice big shot to impress the natives when we upload it to the Screenshots or
Content Creation forum...
First one:
240x180 pixels. Do your screenshot, load it into your image program (MS Photo Editor works as well as anything, if you've got MS Office installed.)
Select an area which covers the object and crop it. Trim the edges until the image is exactly 4:3 size ratio (eg 400x300, 880x660, etc.) and then resize to 240x180:
Wow! Now how'd I do that? Images are like models - the smaller they are, the darker they appear. So to look right, an N gauge model has to be painted a much lighter shade than the same model in O scale. Trainz screenshots tend to be pretty dark anyway (Where's the gamma slider, Auran???) so we need to up the brightness and contrast a little on our miniature screenie.
Photoshop has this lovely properly called layers. You can add stuff over the top of an image without altering whats underneath. How did I get my 4:3 ratio clip without lots of trial and error?
Simple - I created a new image, in this case 880x660, to lay over my 1024x768 screenshot.
I then cut and pasted it onto the screenshot:
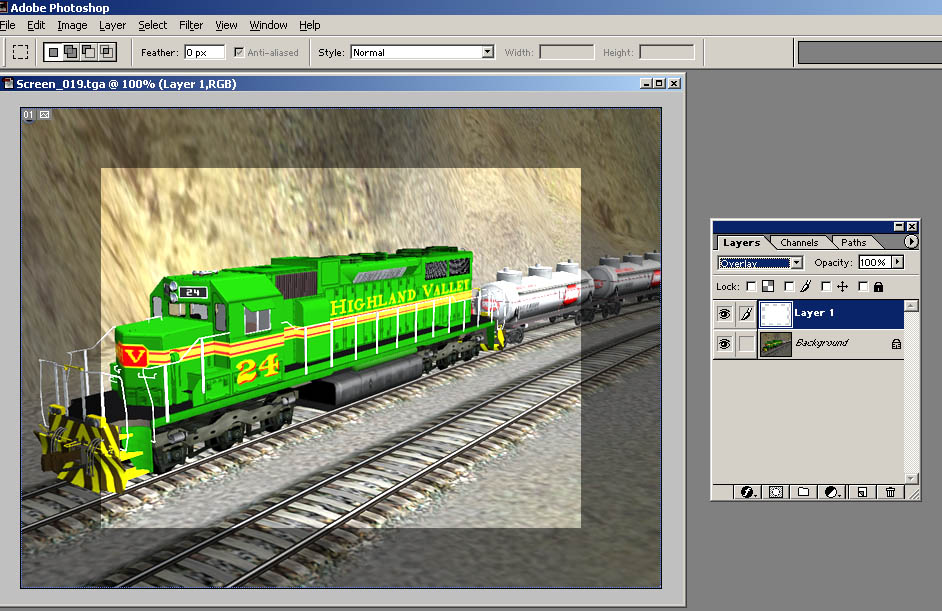
I was rewarded with a big white rectangle in the middle of the image. If you have a look on the right (if you don't have the layers tool, click on Window/Show Layers) you'll see I changed the Layers mode from Normal to Overlay. This gave the benefit of being able to see what I was covering up, and at the same time brightening the image significantly.
Then I was able to move the white overlaid rectangle over the part of the image I wanted:
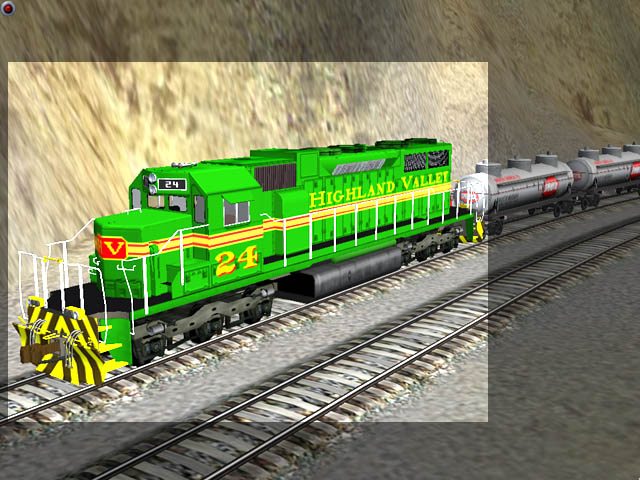
Cropped the image around the lighter area to give me an 880x660 image, then resized to 240x180 and saved.
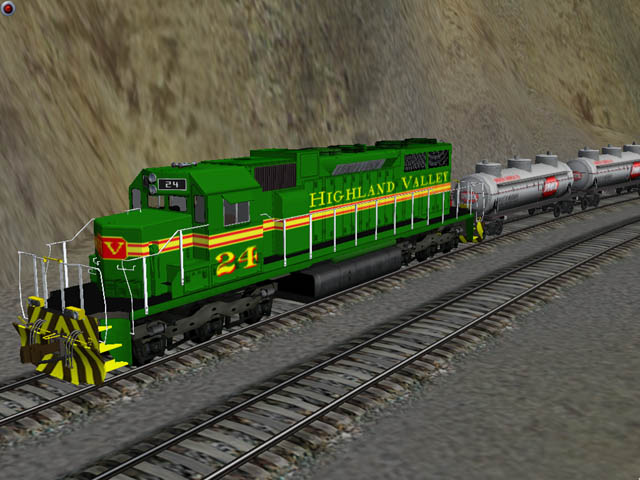
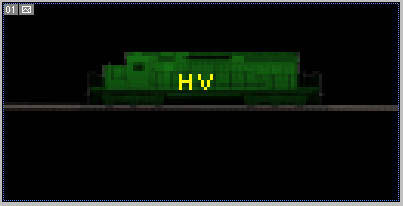
For this, run, don't walk, to the Download Station and get the map LOCOart512 by CAB. Install it and follow the instructions to get a screenie:
This is cropped to 512x512 and saved as our art file:
However, at this stage we have a plain 24-bit RGB file. Whether we save it as .tga or as .bmp, we have no alpha information. It still won't display in Driver consist selection, as in our second selection screenshot at the top of this tutorial. Its as if the file isn't there. We need to create an alpha channel.
In Photoshop, we do this by clicking on Channels in the Layer tool, and then Add Channel. By default, this adds a correctly named alpha channel.
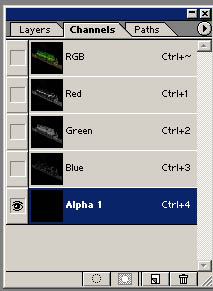
Our image has been blacked out. Thats because the red, green and blue channels were deselected when we added the new one. Just select the RGB channel at the top to see everything again.
If we save this as-is, we're going to have a totally black alpha channel.
WHEN YOU SAVE THE .TGA WITH THE ALPHA CHANNEL, ENSURE YOU SELECT 32-BIT TGA and NOT 24-BIT TGA. Full colour equals 24 bits, plus an 8 bit alpha channel equals 32 bits!
In Trainz, we still can't see anything. Remember we see fully only the areas of the alpha channel that are pure white. The darker the alpha, the more our image fades out until with black (as we have here) it is completely invisible.
What if we simply saved the alpha channel as a pure white block?
Yes, we'd see our train OK, but we'd get undesirable side effects:
Now if you're like me, for your first or second piece of rolling stock that'll be good enough. You'll just be so pleased at being able to see the damn thing you won't want to break it!
But what we need to do is this: edit the alpha channel, colour the area outside the train black, and colour the area covered by the train white. The white shows our train OK, the black lets the Trainz background show through the rest of the image.
Again, Photoshop makes this easy and I'd like to thank Sandman2 for showing us how.
Go to our image, and use the Magic Wand tool to select the black area to the top of the train.
Then hold down Shift and use the wand on the black area below.
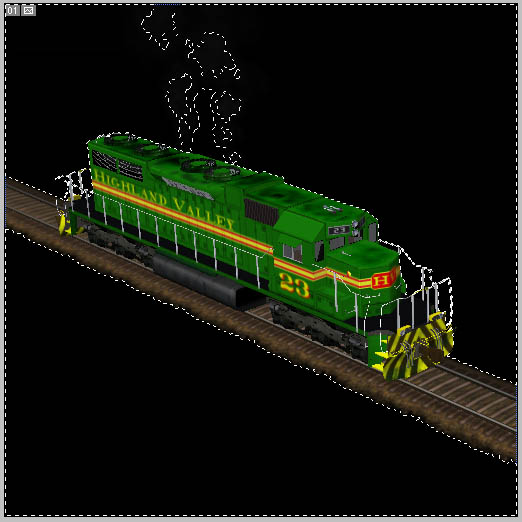
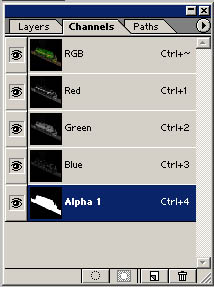
Click on the Channels tool and select the Alpha channel. Hide the RGB channels and we will see the selected outline of the loco on the black alpha. Make sure the background colour is set to white:
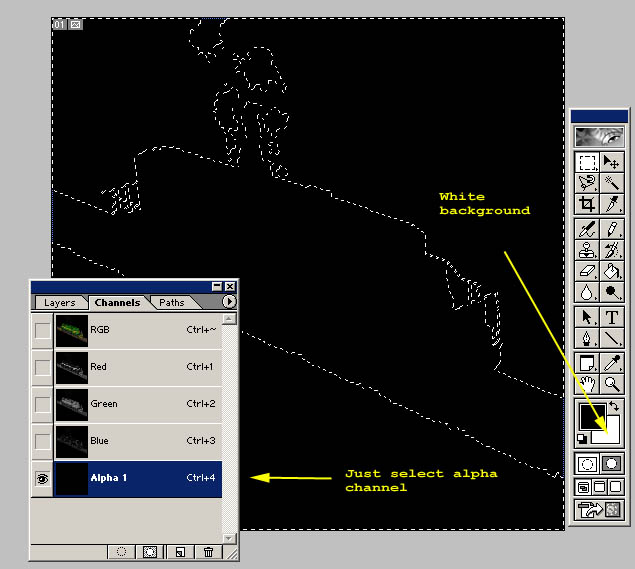
If we delete the selection now, we will have a white background and black train - the exact opposite of what we want. So Select Inverse and we will instead get the desired result:

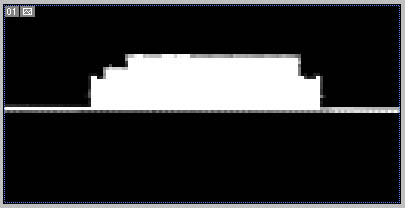
Change the background colour to black, and erase the unwanted bits of exhaust. Note the layers tool now - we have the alpha channel showing the white outline of the loco.
Save the file, and this is what we get (at last!):
Fair cop, we haven't done the consist icon yet. That's next.
Well, I won't need to go into much detail showing how to do this, will I?
Basically, the operation is the same as the previous screenie, except the image we will be working on is 128x64.
Take a horizontal shot from the side, and select an area with a ratio of 2:1.
Try to have the rail level as close to halfway as possible. Even though we are working on a 64-pixel high file, only the top 40 pixels will be displayed in the consist bar. You need a little blank area underneath, so rail level around the 32-pixel mark is OK.
Set the background to black. Delete all extraneous detail except the loco and track.
This file is a bit of a caricature, so don't worry about losing a lot of detail when you resize the image to 128x64. This gives the following (blown up so you can see it better):
In exactly the same way as before, use the magic wand to select the black areas above and below. Create the alpha channel, change the background to white, select the alpha channel and hide the RGB. Invert the selection, and press delete:
Because we're working at such small sizes, note the grey areas around the loco. This isn't a worry and it works like anti-aliased text - it softens the edges and makes the icon image look smoother than it actually is.
Save as a 32-bit .TGA and we're done!
Doing the alpha channel thing with bitmap files is actually simpler, but requires you to work on two files. You don't need a comprehensive editor like Photoshop or PSPro to edit bitmaps. Plain old MS Paint will do!
When you hit PrtScrn in Trainz, it saves a huge .TGA file to your ~Trainz\Screenshots folder. If you don't have anything that will edit a .TGA, you probably don't have a converter either.
So how do we get our bitmaps?
Simple - use SHIFT-PRTSCRN instead.
This copies the screen image to the clipboard. Exit Trainz, open your paint program, and create a new file the same size as your screen resolution (eg 1024x768). Paste the clipboard image into your paint program, and save as a Windows .BMP bitmap!
Now that you've got the image, you can manipulate it exactly as we have done for the targa files above, with the exception that you can't/don't worry about alpha channels. Thats because we're going to use a copy of the file to give us our alpha information. Remember how in the text files above we appended a "_a" to the filename for the alpha?
Here's our 128x64 icon file, saved as a Windows .BMP (again blown up for clarity):
Simply set your background colour to white, select the train, and delete it:
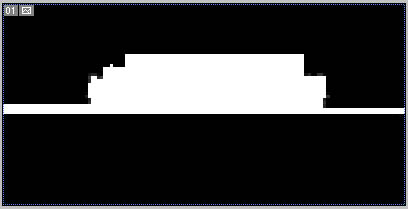
Save the black and white image as the consist icon _a bitmap file. You're done!
Your loco should now happily show up in both the consist selection screen and in the consist bar when you add it to the train.
Now you can sit back, enjoy a refreshing beverage, and start working on some great screenshots showing your new toy in action, for you to put on a website somewhere and boast about in the forums!
Hope this has been useful and educational,
Charlie (cjlear) 12 Feb 2003